

Got a yard that slopes? It can be a pain, right? Things slide around, water runs where it shouldn’t, and you can’t really use the space well. A retaining wall on a slope can fix all that. It holds back the dirt, stops erosion, and makes your yard more usable. We’ll walk through what you need to know about building one, from planning it out to picking materials and getting it done. It might seem like a big job, but it’s totally doable with the right info.
Understanding Retaining Walls on Slopes
A retaining wall is basically a structure built to hold back soil. Think of it like a sturdy barrier that stops dirt from sliding downhill. They’re super common in landscaping and construction, especially when you’ve got a yard that isn’t perfectly flat. A professional Ottawa landscaping company uses retaining walls to keep everything in place and make sloped areas more usable and visually appealing.
Why You Might Need A Retaining Wall on a Slope
Lots of homeowners end up needing a retaining wall for a few good reasons. The most common one is to stop soil erosion. When rain hits a slope, it can wash away the topsoil, which isn’t good for your plants or the stability of your yard. Another big reason is to create usable flat spaces. If you want a patio, a garden bed, or even just a safer driveway on a hill, a retaining wall can level things out. They also play a role in managing water runoff, directing it away from your house and other structures.
Here are some common scenarios:
- Preventing Soil Erosion: Keeps your soil from washing away downhill.
- Creating Level Areas: Makes space for patios, gardens, or play areas.
- Improving Driveway Safety: Reduces the steepness of a sloped driveway.
- Managing Water Runoff: Helps control where water goes on your property.
How Retaining Walls Function
So, how does a retaining wall actually work? It’s all about resisting the force of the soil pushing against it. The wall acts as a barrier, but it’s not just standing there on its own. Proper construction involves building a strong base and often incorporating drainage to relieve pressure. Without good drainage, water can build up behind the wall, creating a lot of force (hydrostatic pressure) that can push the wall over time. The wall’s design and materials need to be strong enough to handle this pressure and keep the soil in place.
The key to a successful retaining wall is managing the forces acting upon it. This means not only building a strong face but also addressing the water that naturally collects behind it. Ignoring drainage is a common mistake that can lead to costly repairs down the line.
Planning Your Retaining Wall Project
Before you even think about grabbing a shovel, a solid plan is your best friend when building a retaining wall on a slope. This isn’t like putting up a garden fence; it’s a structural project that needs careful thought. Getting this part right means the difference between a wall that lasts for decades and one that starts leaning after the first heavy rain.
Site Assessment for Sloped Properties
First things first, you’ve got to really look at your yard. Slopes aren’t all the same, right? Some are gentle, others are practically cliffs. You need to figure out just how steep yours is and what kind of soil you’re dealing with. Is it clay that holds water, or sandy stuff that drains easily? This all matters for how the wall will hold up. Also, check for any underground pipes or wires – nobody wants a surprise there. Understanding your site’s unique challenges is the most important first step.
Designing Your Retaining Wall on a Slope
Once you know your site, you can start sketching. Think about how high the wall needs to be and how long it will run. This isn’t just about looks; it dictates the materials you’ll need and how much of them. For slopes, you’ll often need a deeper base and possibly some reinforcement behind the wall, like gravel or special fabric, to keep everything stable. It’s a good idea to draw it out, even if it’s just a rough sketch, to get a handle on the measurements.
Here’s a quick look at what to consider:
- Height: Taller walls need stronger foundations and more robust materials.
- Length: This affects the total amount of materials needed.
- Purpose: Is it just for looks, or does it need to hold back a significant amount of soil?
- Drainage: Where will water go? This is super important on slopes.
Marking the Wall Layout
With a design in hand, it’s time to get physical with your yard. Use stakes and string, or even spray paint, to mark out exactly where the wall will go. Make sure it’s straight, or curved, exactly as you planned. For slopes, it’s often helpful to have a reference point, like an existing structure or even a temporary line, to make sure your wall is square and true. This step might seem simple, but getting the layout precise now saves a lot of headaches later on.
Building a retaining wall on a slope requires more than just stacking blocks. You’re essentially building a structure that fights gravity and the constant pressure of the soil behind it. Proper planning accounts for water management and the soil’s natural tendency to move downhill.
Choosing the Right Materials for Stability
Picking the right stuff to build your retaining wall is a big deal, especially when it’s on a slope. You want something that looks good, lasts a long time, and most importantly, holds back all that dirt without any drama. It’s not just about what looks nice; it’s about what’s strong enough for the job.
Popular Retaining Wall Materials
There are a few go-to options homeowners often consider. Each has its own vibe and practical side.
- Concrete Blocks: These are super common. They’re durable, pretty easy to stack, and a lot of them are designed to interlock, which helps with stability. They come in all sorts of colors and textures, so you can get a look that fits your yard.
- Natural Stone: If you’re going for a more classic, natural look, stone is the way to go. It’s beautiful and can last forever, but it’s usually more expensive and takes a lot more work to put in place. Think big boulders or carefully stacked stones.
- Timber (Wood): Wood can be a budget-friendly choice, and it gives a rustic feel. However, it’s not as long-lasting as other materials. You’ll need to treat it to resist rot and bugs, and even then, it won’t last as long as concrete or stone, especially with all the moisture a slope can bring.
- Modular Wall Systems: These are basically pre-made systems, often concrete-based, that are engineered for easy installation and strength. They usually have a built-in locking mechanism and are designed to work with drainage and reinforcement materials.
Factors Influencing Material Selection
So, how do you actually pick one? It’s not just about what catches your eye.
- The Slope and Soil: How steep is your slope? What kind of soil are you dealing with? A steeper slope or looser soil means you need stronger materials and possibly extra reinforcement like geogrids. The wall needs to handle the pressure from the soil behind it.
- Your Budget: Let’s be real, cost is always a factor. Natural stone is usually the priciest, while treated timber might be the cheapest upfront. Concrete blocks and modular systems fall somewhere in the middle, offering a good balance.
- The Look You Want: What’s the overall style of your home and yard? Do you want something modern, rustic, or traditional? The material you choose will set the tone.
- How Much Work You Want to Do: Some materials, like interlocking concrete blocks, are more DIY-friendly. Others, like natural stone, often require professional help.
Essential Construction Techniques for Slopes
Building a retaining wall on a slope isn’t quite like building one on flat ground. You’ve got to think about gravity and water a bit more. Getting these steps right is super important for making sure your wall actually stays put and does its job.
Excavation and Foundation Preparation
First things first, you need to dig out the area where your wall will sit. For a slope, this means digging a trench that’s level at the bottom, even though the ground above it is sloped. This trench needs to be wide enough for your base material and deep enough to bury at least the bottom half of your first layer of blocks or stones. This buried portion is what really anchors the wall. A solid, level foundation is the backbone of any good retaining wall, especially when you’re fighting gravity on a hill.
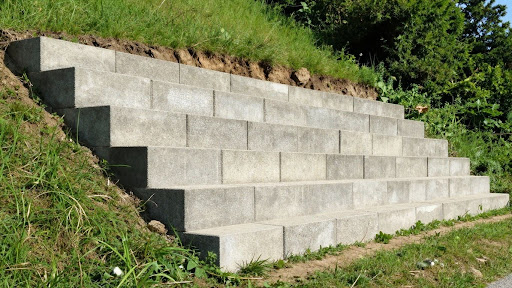
Building the Wall in Stages
When you’re working on a slope, you often can’t just build one long, straight wall. Instead, you might need to “step” the wall. This means building shorter sections that are level, with each section slightly higher than the one below it. Think of it like building a staircase into the hill. This method breaks up the force of the soil and water, making the whole structure much more stable. It also looks pretty good, adding a nice visual element to your yard.
Here’s a quick look at how stepping works:
- Level Base: Each individual wall section needs a perfectly level base. Don’t just follow the slope of the ground.
- Offsetting: When you build the next tier up, make sure it’s set back slightly from the one below it. This overlap adds strength.
- Terracing: For really steep slopes, you might end up with multiple short walls creating flat areas, or terraces, in your yard.
Ensuring the Wall is Square
Even though you’re building on a slope, the face of your wall should be straight up and down, or “plumb.” You can check this as you go by using a level on each block or stone. If the wall leans too much, it puts extra stress on it. For walls made of interlocking blocks, they’re usually designed to have a slight backward lean, called “batter,” which actually helps them resist the soil pressure. Always follow the manufacturer’s recommendations for the specific blocks you’re using. Getting this right means the wall looks good and, more importantly, it’s structurally sound.
Proper drainage behind the wall is non-negotiable on slopes. Water buildup is one of the biggest enemies of retaining walls, creating immense pressure that can lead to failure. Always plan for a way for water to escape.
Critical Drainage Considerations
Water is the silent enemy of any retaining wall, especially on a slope where gravity is already working against you. If water can’t escape from behind the wall, it builds up pressure. Think of it like a balloon filling with water – eventually, it’s going to burst. This pressure can push the wall outward, causing it to lean, crack, or even fail completely. Proper drainage isn’t just a good idea; it’s absolutely vital for the long-term health of your wall.
The Importance of Drainage on Slopes
When you build a retaining wall on a slope, you’re essentially creating a barrier that holds back soil. This soil naturally absorbs rainwater and any other moisture. Without a way for that water to get out, it saturates the soil, making it much heavier and more prone to shifting. This added weight and hydrostatic pressure are what put immense stress on your wall. On a slope, this effect is amplified because water naturally wants to flow downhill, and your wall is in its way. Ignoring drainage is like building a dam without an overflow – you’re just waiting for a problem.
Implementing Drainage Systems
So, how do we give that water a way out? There are a few key components to a good drainage system behind a retaining wall:
- Gravel Backfill: Instead of just piling the excavated soil back against the wall, a layer of clean, crushed gravel is typically placed directly behind the wall structure. This gravel acts like a sponge, allowing water to flow through it easily.
- Perforated Drain Pipe: At the very base of the wall, usually nestled in the gravel layer, a perforated pipe (a pipe with small holes all along it) is installed. This pipe collects the water that drains through the gravel and directs it away from the wall, often to a lower point on the property or a designated drainage area.
- Geotextile Fabric: Sometimes, a special fabric is used to separate the gravel from the native soil. This stops the finer soil particles from washing into the gravel and clogging up the drainage system over time, which is a common issue.
- Weep Holes: For some types of walls, small openings (weep holes) are built into the face of the wall itself, usually near the bottom. These allow water to escape directly through the wall structure.
Drainage for Different Wall Heights
The complexity of your drainage system often depends on how tall your retaining wall is. For shorter walls, a simple gravel backfill and a basic drain pipe might be sufficient. However, as walls get taller, the amount of soil they’re holding back increases significantly, as does the potential for water pressure.
- Walls under 3 feet: Often, a layer of gravel and a perforated pipe at the base are enough. Make sure the pipe slopes away from the wall.
- Walls between 3 and 6 feet: You’ll likely need a more robust gravel backfill extending further up the wall, a well-placed drain pipe, and possibly geotextile fabric to keep things clean. The pipe should definitely be daylighted (emptying onto the surface) or connected to a proper drainage system.
- Walls over 6 feet: These are substantial structures. They almost always require professional engineering, which will include detailed specifications for drainage, often involving multiple layers of drainage material and a carefully designed outlet for the drain pipe. The soil behind these walls needs to be managed very carefully.
Building a retaining wall without considering how water will escape is a recipe for disaster. It’s one of those things that seems minor until it’s the reason your wall fails. Think of it as the wall’s plumbing – it’s got to work, or the whole system breaks down.
When to Hire a Professional
Now, let’s talk about when calling in the pros is the smarter move. For anything beyond a simple, low wall, professional help is usually the way to go. Building a retaining wall, especially on a slope, involves significant forces from the soil and water pushing against it. If it’s not built correctly, it can fail, leading to costly repairs and potential damage to your property.
Consider hiring a professional if:
- The wall is tall: Walls over 3-4 feet tall are generally best left to experienced builders. The pressure they need to withstand is immense.
- The slope is steep: Steep slopes add complexity and risk to the construction process.
- Drainage is complicated: Proper drainage is absolutely critical for retaining wall longevity, and professionals know how to design and implement effective systems.
- You’re unsure about engineering: For larger walls, a geotechnical engineer might even be needed to design the structure.
- Local codes require it: Some areas have specific regulations about retaining wall construction, especially for taller structures.
Ensuring Long-Term Durability
Whether you DIY or hire out, the goal is a wall that lasts. This means paying close attention to the foundation, the backfill material, and, of course, drainage. A well-built retaining wall is a significant investment, and getting it right the first time saves a lot of headaches and money in the long run. It’s about more than just stacking blocks; it’s about managing earth and water effectively.
So, building a retaining wall on a slope isn’t just about stacking rocks or blocks. It’s about understanding the ground beneath your feet and making sure everything stays put, especially when water wants to run downhill. Whether you decide to tackle a smaller project yourself or call in the pros for a bigger job, remember that good planning and proper drainage are super important. For professional Ottawa retaining wall installation and a stress-free experience, call Bennett Lawn & Landscape at (613) 416-6408 today for a free estimate.
Frequently Asked Questions:
Why do I need a retaining wall on my sloped yard?
Retaining walls are super helpful for sloped yards! They stop soil from washing away when it rains (that’s erosion) and help keep your yard from getting washed out. They can also create flat areas for things like gardens or patios, making your yard more useful and safer to use.
What materials are best for retaining walls on slopes?
Strong materials that stack well are usually best. Think concrete blocks, which are easy to work with, or natural stone for a beautiful look. Sometimes, special interlocking blocks made for retaining walls are a great choice too because they are designed for stability.
How important is drainage for a retaining wall on a slope?
Drainage is incredibly important! Water can build up behind the wall, creating a lot of pressure that can push it over or make it lean. Good drainage, like using gravel and drain pipes, lets water escape and keeps the wall strong and lasting.
How do I make sure my retaining wall is stable on a steep slope?
Building on a steep slope means you need to be extra careful. It’s often best to build the wall in ‘steps’ going up the slope rather than one long, tall wall. This makes it much more stable. Also, make sure you dig a good, deep foundation and use plenty of strong materials, along with excellent drainage.
